17 Yoga Poses: Step-by-Step Guide with Names, Benefits & How to Do Them
This post contains affiliate links, which means we may earn a commission if you purchase through our links—at no extra cost to you. As an Amazon Associate we earn from qualifying purchases. We only recommend products we use or trust. Learn more about affiliate marketing or read our full disclosure.
Yoga is one of the most accessible and effective ways to boost your body, mind, and mood.
Whether you’re just stepping onto the mat for the first time or coming back after a break, getting familiar with yoga poses—and knowing how to do them safely—is the key to a rewarding practice.
In this step-by-step guide, I’ll walk you through essential yoga poses, sharing their names (both Sanskrit and English), benefits, alignment tips, and even some variations you can try.
By the time we’re done, you’ll have a practical roadmap to help you build strength, flexibility, balance, and mindfulness—and maybe even fall in love with your practice along the way.
Important Note: Before starting any new yoga practice, especially if you have a medical condition, injury, or have been inactive, consult a qualified healthcare professional. Always listen to your body and move at a safe, comfortable pace. Yoga should challenge you gently — not cause pain.
Ready? Let’s get started!
Why Learn Yoga Poses Step-by-Step?
Yoga isn’t just about touching your toes or holding a pose—it’s about moving with intention, tuning in to your body, and cultivating awareness.
Having the right equipment can make your practice more comfortable and effective.
For example, the Liforme Printed Yoga Mat, (available on Amazon) comes with a free yoga bag and offers excellent grip, cushioning, and alignment guides to help you move safely and confidently—whether at home or in a studio.
I’ve been practicing yoga for over six years, and I’ve found that having a high-quality mat makes a huge difference, allowing you to focus on the poses and really get the most out of your practice.
Taking the time to learn yoga poses step-by-step comes with some big benefits:
1. Better Alignment
Getting the alignment right isn’t just about looking good in a pose—it’s about keeping your body safe and making sure every stretch, bend, or balance actually works.
When your body is aligned, you can go deeper into each pose and feel its full benefits without risking injury.
2. Safer Progression
Yoga isn’t a race, and trying to push too hard too soon can lead to frustration—or worse, injury. Learning yoga poses step-by-step helps you build strength and flexibility gradually, at a pace that’s right for your body.
This way, every small improvement is sustainable and rewarding.
3. Improved Body Awareness
As you practice yoga poses step-by-step, you start tuning in to your body in a whole new way. You’ll notice subtle muscle engagement, gentle stretches, and even your breathing patterns—helping you move more mindfully both on and off the mat.
4. More Confidence
Knowing exactly how to enter, hold, and exit a pose makes your practice feel effortless and empowering. With each yoga pose you master step-by-step, you’ll move with more confidence—and enjoy your time on the mat even more.
Foundation Poses: The Building Blocks of Yoga
These beginner-friendly poses are the starting point for nearly every yoga practice. Think of them as the roots of a tree—mastering them gives your practice a strong, steady foundation.
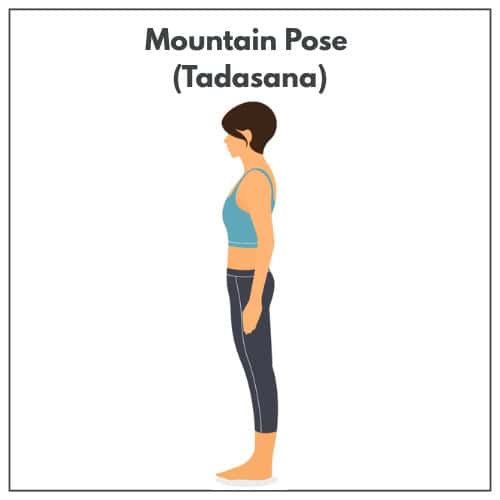
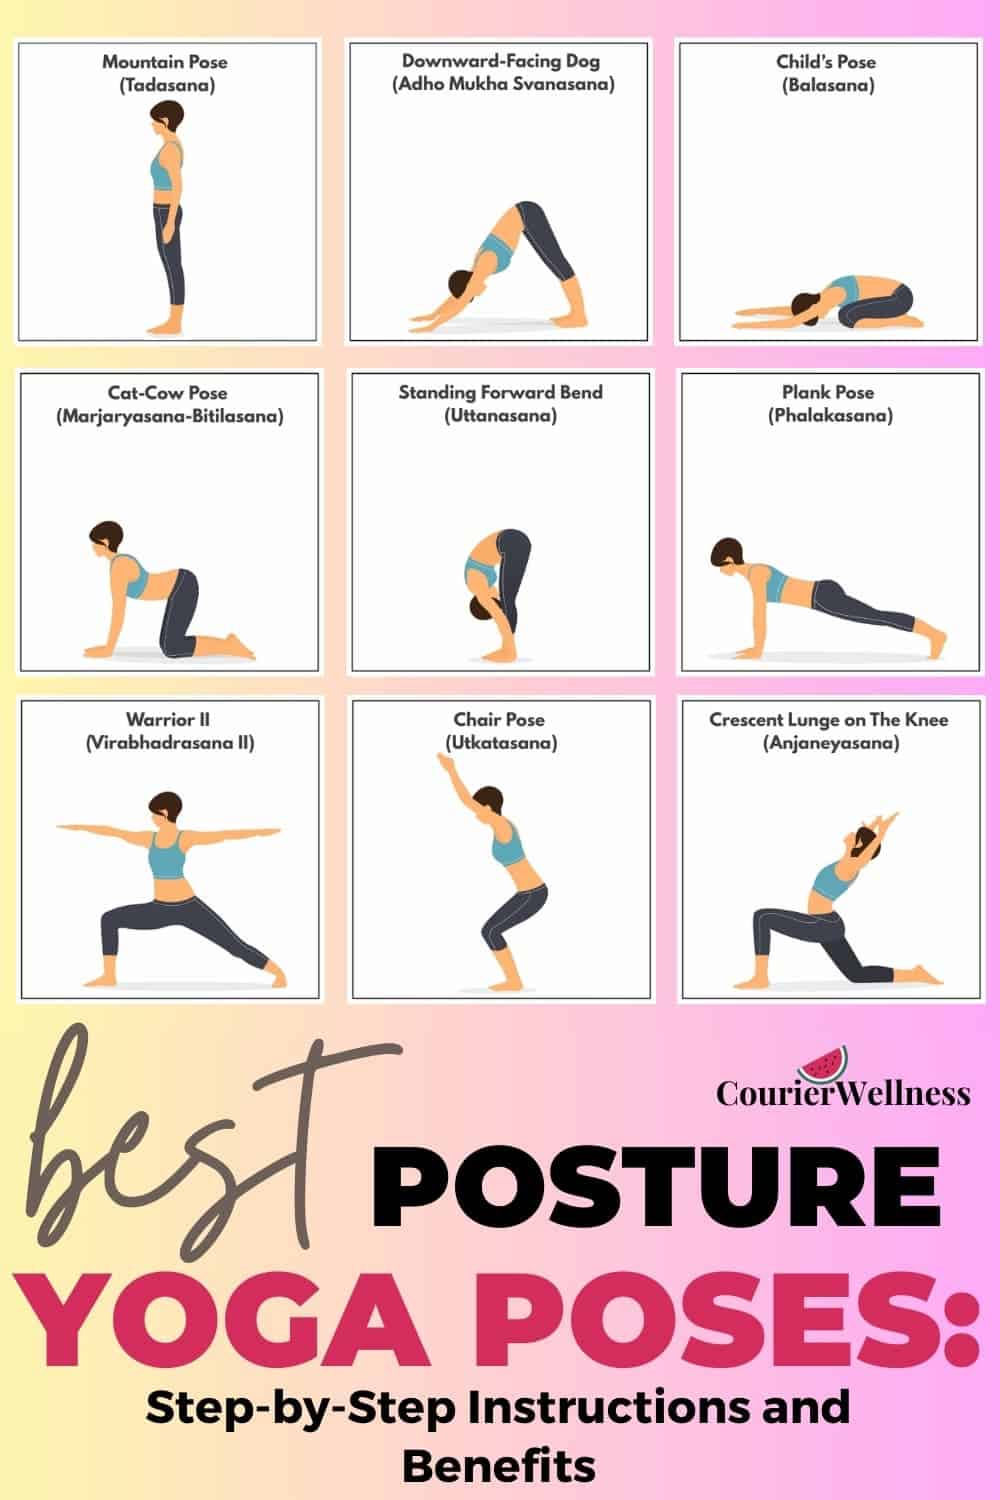
1. Mountain Pose (Tadasana)
Type: Standing Pose
Benefits:
- Improves posture
- Builds awareness of alignment
- Strengthens legs and core
- Encourages steady, grounded breathing
How to Do It (Step-by-Step):
- Stand with your feet hip-width apart—or together if that feels comfortable.
- Ground your feet evenly, pressing through heels, toes, and the outer edges.
- Lengthen your spine, gently drawing your belly in.
- Relax your shoulders, letting them drop away from your ears.
- Keep your arms by your sides or bring your hands together at your heart.
- Take deep breaths and stand tall, feeling rooted yet lifted.
Tip : Imagine a string gently lifting the crown of your head toward the ceiling—this helps you stay elongated and balanced.
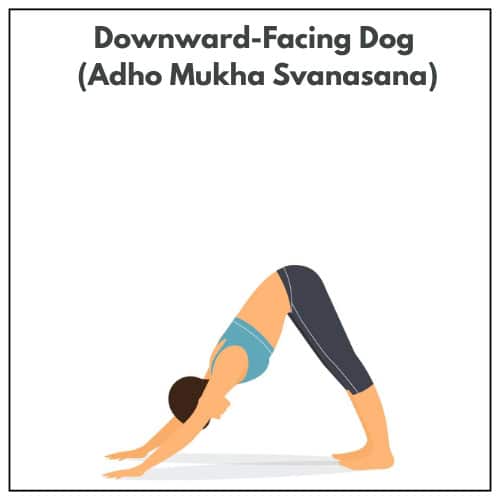
2. Downward-Facing Dog (Adho Mukha Svanasana)
Type: Inversion + Stretch
Benefits:
- Stretches hamstrings, calves, and spine
- Strengthens shoulders, arms, and core
- Relieves back tension
- Energizes the body
How to Do It (Step-by-Step):
- Start on your hands and knees in a tabletop position.
- Spread your fingers wide and press firmly into your palms.
- Lift your knees off the mat and gently straighten your legs.
- Lift your hips up and back, forming an inverted “V” shape.
- Keep your knees slightly bent if your hamstrings feel tight.
- Relax your head and focus on lengthening your spine.
Tip : Focus on creating a long, strong spine rather than forcing perfectly straight legs—your body will thank you!
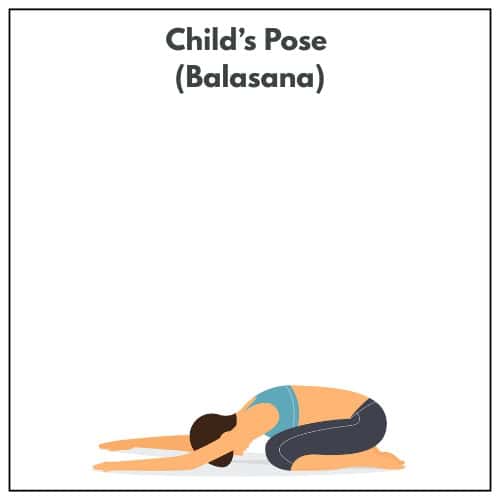
3. Child’s Pose (Balasana)
Type: Restorative Pose
Benefits:
- Calms the nervous system
- Relieves back and hip tension
- Supports mindful breathing
How to Do It (Step-by-Step):
- Kneel on your mat and sit back on your heels.
- Fold forward, lowering your chest toward your thighs.
- Extend your arms forward or let them rest alongside your body.
- Rest your forehead on the mat and take slow, deep breaths.
Tip : If you need extra space for your hips, gently open your knees wider—comfort comes first!
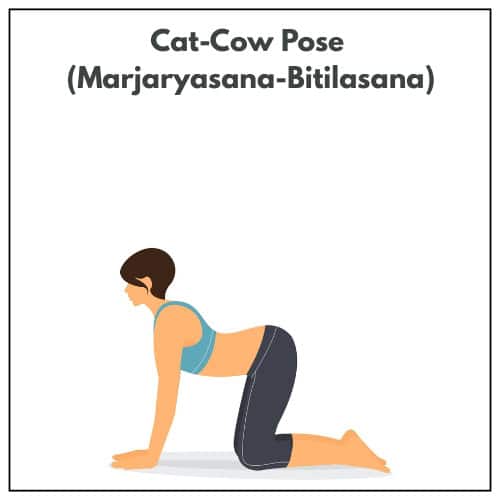
4. Cat-Cow Stretch (Marjaryasana–Bitilasana)
Type: Gentle Flow
Benefits:
- Increases spinal mobility
- Warms up the body
- Connects movement with breath
How to Do It (Step-by-Step):
- Start on your hands and knees in a tabletop position.
- Cow Pose: Inhale as you drop your belly, arch your back, and lift your chest.
- Cat Pose: Exhale as you round your spine, tuck your chin, and draw your belly in.
- Move slowly through 5–10 rounds, feeling the rhythm of your breath.
Tip: Match your breath to each movement—it deepens your mind-body connection and makes the flow feel effortless.
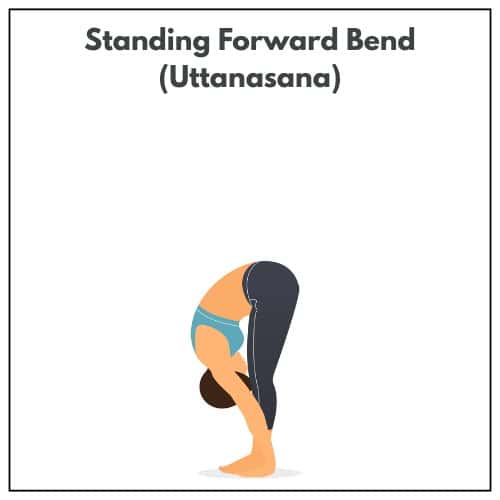
5. Standing Forward Fold (Uttanasana)
Type: Standing Stretch
Benefits:
- Lengthens hamstrings
- Releases back tension
- Calms the mind
How to Do It (Step-by-Step):
- Stand tall with your feet hip-width apart.
- Hinge forward from your hips.
- Bend your knees as much as needed for comfort.
- Let your arms hang down or gently hold opposite elbows.
- Relax your neck completely and breathe deeply.
Tip: Avoid locking your knees—keep the fold soft and gentle for a safe stretch.
Strength-Building Poses
These poses help build core, leg, and upper-body strength while improving stability and balance.
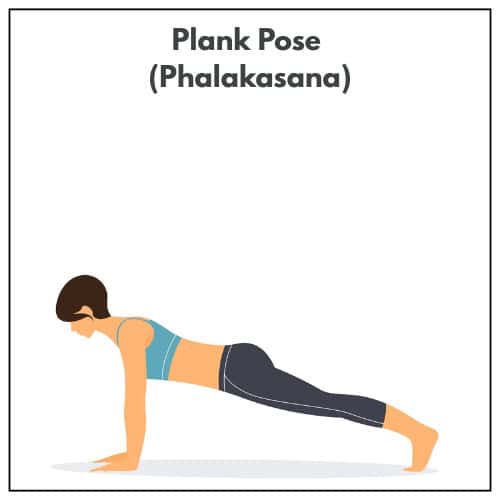
6. Plank Pose (Phalakasana)
Type: Strength Pose
Benefits:
- Strengthens core, arms, and shoulders
- Prepares the body for more advanced poses
- Supports proper spinal alignment
How to Do It (Step-by-Step):
- Start on your hands and knees in a tabletop position.
- Step your feet back, forming a straight line from head to heels.
- Engage your core and press firmly through your palms.
- Keep your neck neutral and heels pressing gently back.
Tip: Drop your knees for a low-impact version while still building strength and stability.
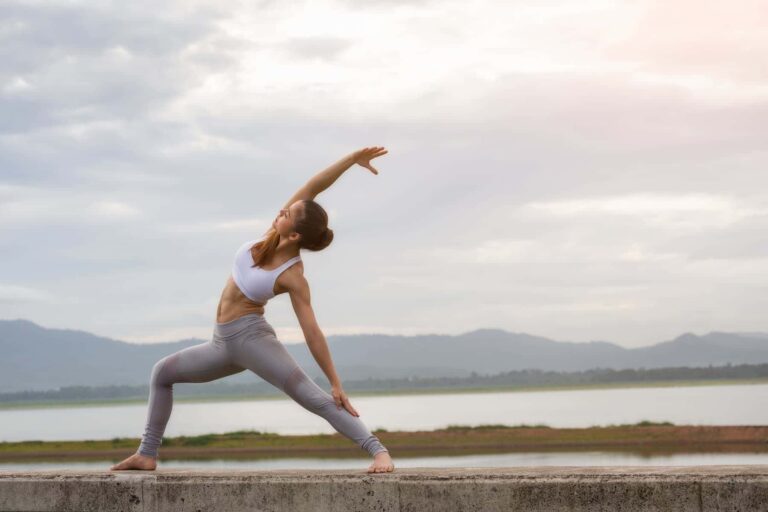
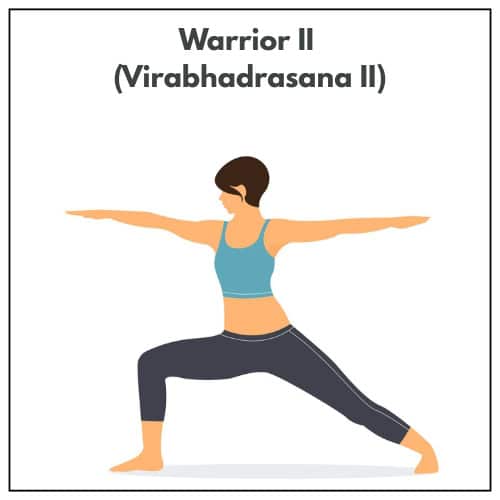
7. Warrior II (Virabhadrasana II)
Type: Standing Strength
Benefits:
- Strengthens legs, glutes, and arms
- Improves balance and focus
- Opens hips and chest
How to Do It (Step-by-Step):
- Stand with your feet wide apart.
- Turn your right foot out 90 degrees and your left foot slightly inward.
- Bend your right knee so it’s stacked over your ankle.
- Extend your arms parallel to the floor, reaching actively through your fingertips.
- Gaze over your right hand and hold for 5–10 breaths, then switch sides.
Tip: Keep your front knee aligned with the middle of your foot to protect your joints and maintain stability.
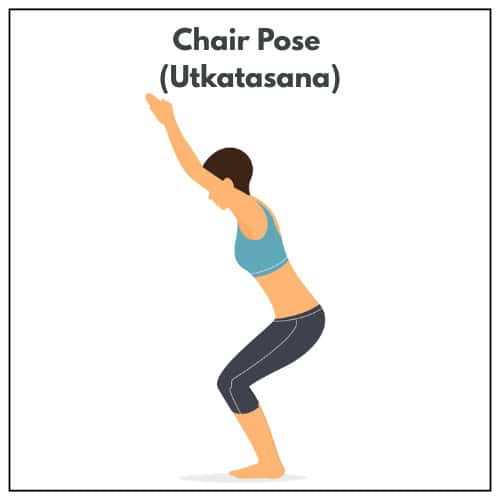
8. Chair Pose (Utkatasana)
Type: Power-Building Pose
Benefits:
- Strengthens thighs, glutes, and back
- Engages the core
- Boosts endurance
How to Do It (Step-by-Step):
- Stand tall with your feet hip-width apart.
- Bend your knees as if you’re sitting back into a chair.
- Raise your arms overhead, keeping your shoulders relaxed.
- Lift your chest and engage your core.
- Hold the pose while breathing steadily and deeply.
Tip: Shift your weight into your heels to stay stable and protect your knees.
Flexibility and Mobility Poses
These poses help release tightness, increase range of motion, and keep your body feeling open and agile.
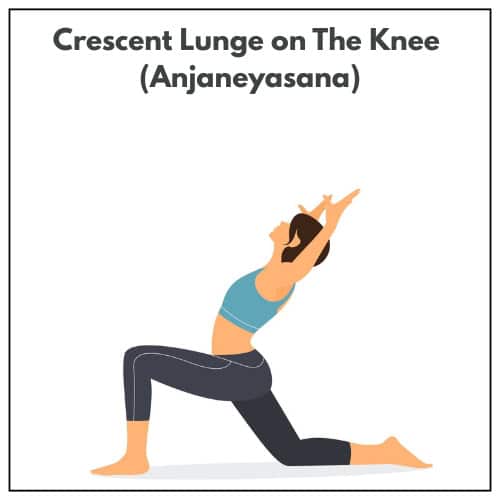
9. Crescent Lunge on the Knee (Anjaneyasana)
Type: Hip-Opening Pose
Benefits:
- Stretches hip flexors
- Strengthens legs
- Improves posture
How to Do It (Step-by-Step):
- From tabletop or Downward-Facing Dog, step your right foot forward between your hands.
- Lower your left knee gently to the mat.
- Lift your chest and sweep your arms overhead.
- Sink your hips slightly forward, feeling a gentle stretch through your hip flexors.
- Hold for several breaths, then switch sides.
Tip: Keep your hips square and ribs gently tucked in for better alignment and stability.
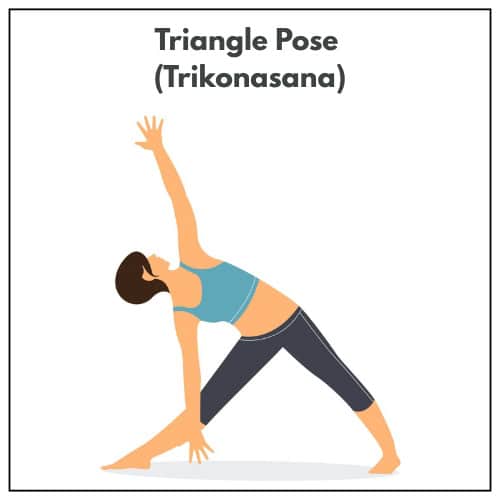
10. Triangle Pose (Trikonasana)
Type: Standing Stretch
Benefits:
- Lengthens hamstrings and side body
- Strengthens legs
- Improves balance
How to Do It (Step-by-Step):
- Stand with your feet wide apart.
- Turn your right foot out 90 degrees and angle your left foot slightly in.
- Extend your arms out wide at shoulder height.
- Reach forward with your right arm, then lower it to your shin, ankle, or a yoga block.
- Lift your left arm toward the ceiling, opening your chest and shoulders.
- Hold for several breaths, then repeat on the other side.
Tip: Imagine your body pressed gently between two panes of glass—avoid leaning forward and keep your spine long.
Balance Poses
Balancing poses not only build physical stability but also sharpen focus and calm the mind.
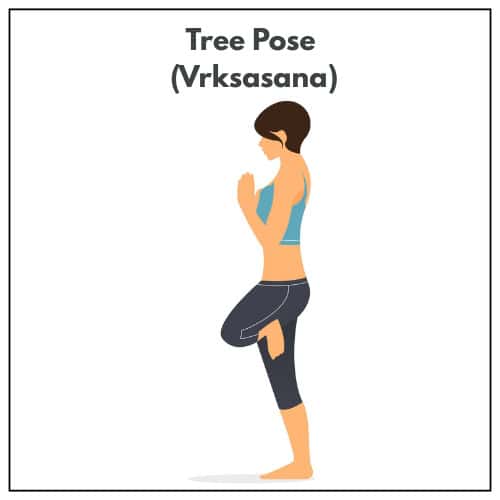
11. Tree Pose (Vrksasana)
Type: Balance Pose
Benefits:
- Strengthens stabilizer muscles
- Improves focus and concentration
- Enhances posture
How to Do It (Step-by-Step):
- Stand tall in Mountain Pose.
- Shift your weight onto one leg.
- Place the sole of your other foot on your ankle, calf, or thigh—avoid pressing directly on the knee.
- Bring your hands to your heart center or reach them overhead.
- Hold the pose while breathing deeply and steadily.
Tip: Gaze at a still point in front of you—this helps your body stay balanced and your mind calm.
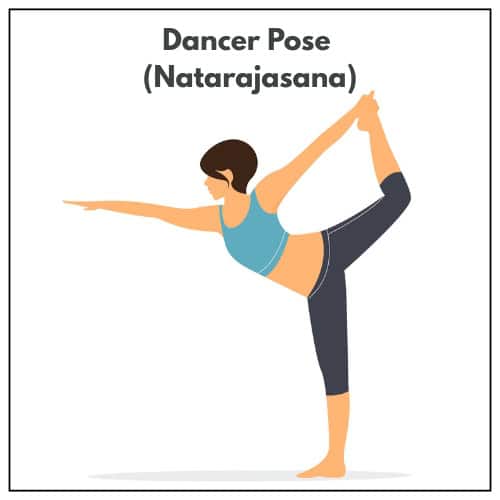
12. Dancer Pose (Natarajasana)
Type: Balance + Backbend
Benefits:
- Improves balance
- Opens chest, shoulders, and hips
- Strengthens legs
How to Do It (Step-by-Step):
- Stand tall in Mountain Pose.
- Bend your right knee and hold your foot or ankle from behind.
- Press your foot gently into your hand, creating a small lift.
- Extend your left arm forward to help with balance if you are a beginner.
- Keep your chest lifted and your gaze steady. Hold, then switch sides.
Tip: Go slow—balancing takes patience and mindful movement.
Backbends and Heart-Opening Poses
These poses help counteract modern habits like sitting and hunching, opening the chest and strengthening the back.
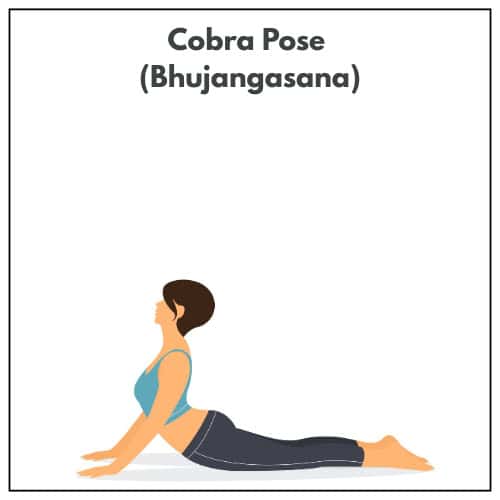
13. Cobra Pose (Bhujangasana)
Type: Backbend
Benefits:
- Strengthens back muscles
- Opens the chest
- Improves posture
How to Do It (Step-by-Step):
- Lie on your stomach with your hands under your shoulders.
- Press into your palms and lift your chest gently off the mat.
- Keep your elbows slightly bent and close to your body.
- Draw your shoulders back and away from your ears.
- Breathe deeply, maintaining a gentle lift without straining.
Tip: Keep your hips grounded and avoid pushing too high—gentle and steady is best.
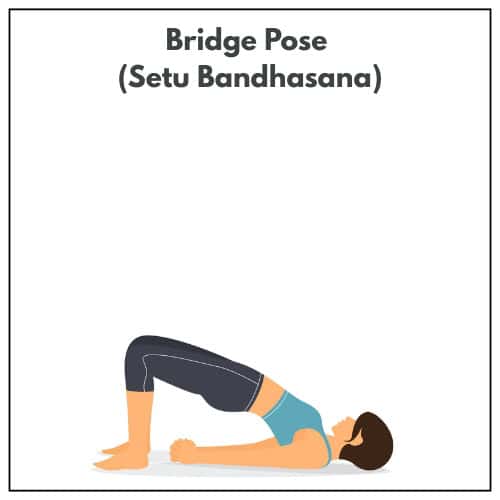
14. Bridge Pose (Setu Bandhasana)
Type: Backbend / Heart-Opening Pose
Benefits:
- Opens the chest and hips
- Strengthens glutes and back
- Reduces fatigue
How to Do It (Step-by-Step):
- Lie on your back with your knees bent and feet hip-width apart.
- Press your feet firmly into the mat.
- Lift your hips upward, creating a gentle arch in your spine.
- If comfortable, interlace your hands under your body to open your chest further.
- Hold for several breaths, keeping your body steady and engaged.
Tip: Make sure your knees track straight ahead and don’t splay outward—this keeps your hips and knees safe.
Gentle Poses for Relaxation
Relaxation is just as important as strength and flexibility—these poses help calm the mind and release tension.
15. Seated Forward Bend (Paschimottanasana)
Type: Gentle Forward Fold
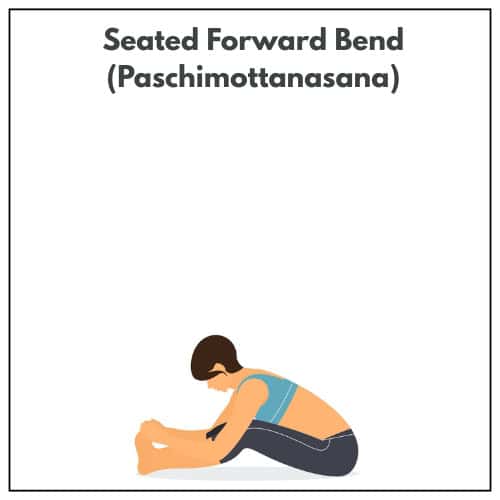
Benefits:
- Calms the mind
- Stretches hamstrings and lower back
- Encourages slow, mindful breathing
How to Do It (Step-by-Step):
- Sit on the mat with your legs extended straight in front of you.
- Inhale deeply and lengthen your spine.
- Exhale and fold forward from your hips, reaching toward your feet.
- Keep your knees slightly bent if your hamstrings are tight.
- Breathe slowly and gently, maintaining a soft fold.
Tip: Avoid rounding your spine forcefully—keep the fold gentle and mindful for a safe stretch.
16. Supine Twist (Supta Matsyendrasana)
Type: Gentle Twist / Relaxation Pose
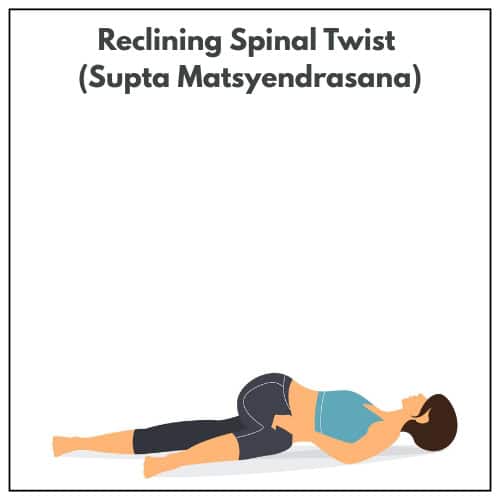
Benefits:
- Releases back tension
- Aids digestion
- Encourages relaxation
How to Do It (Step-by-Step):
- Lie on your back and hug your knees into your chest.
- Drop your knees gently to one side.
- Extend the opposite arm outward, keeping shoulders grounded.
- Hold the twist for several breaths, then switch sides.
- Relax your neck and breathe slowly throughout the pose.
Tip: Let gravity do the work—avoid forcing the twist and allow your body to release naturally.
17. Savasana (Corpse Pose)
Type: Relaxation / Restorative Pose
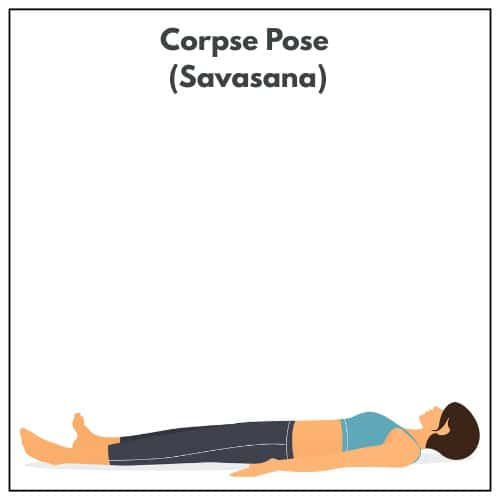
Benefits:
- Promotes deep relaxation
- Resets the nervous system
- Helps integrate your practice
How to Do It (Step-by-Step):
- Lie flat on your back with legs and arms comfortably spread.
- Close your eyes and allow your body to relax completely.
- Breathe naturally and let go of any tension.
- Stay in the pose for 3–5 minutes—or longer if you have time.
Tip: Remember, Savasana is a pose too—approach it with intention, just like any other part of your practice.
How to Create Your Own Yoga Sequence
Once you know the poses, you can start creating sequences that feel good for your body and mind. A balanced practice usually includes a mix of warm-up, standing, strength, stretching, and relaxation poses.
Here’s an example structure:
- Warm-Up – Start gentle with Cat-Cow, light stretches, and mindful breath work to wake up your body
- Standing Poses – Build strength and focus with Warrior II, Triangle, and Tree Pose.
- Strength Poses – Challenge your core, arms, and legs with Plank and Chair Pose.
- Stretching & Opening – Release tension and open tight areas with Low Lunge and Forward Fold.
- Relaxation – Finish your practice by calming the body and mind with Supine Twist and Savasana
Feel free to mix and match poses based on what your body needs that day—yoga is about listening to yourself as much as following a plan.
Tips for Practicing Yoga Poses Safely
Practicing safely ensures you get the most from your yoga practice while avoiding injury.
Here are some key tips:
1. Start Slow and Progress Gradually
Pushing too quickly can lead to injury. Move at a pace that feels right for your body and increase intensity gradually.
2. Use Props When Needed
Sometimes a pose feels just out of reach—maybe your hamstrings are tight, your hips won’t quite open, or your hands can’t comfortably reach the floor yet. That’s completely normal, especially when you’re starting out.
This is exactly where yoga props can make a huge difference.
A simple yoga block can bring the floor closer to you in poses like Triangle or Forward Fold, so you can focus on proper alignment instead of straining. A yoga strap is incredibly helpful for stretches where your flexibility isn’t quite there yet—it lets you lengthen safely without forcing your body.
And if sitting or restorative poses feel uncomfortable, a yoga bolster can support your hips, back, or knees so you can truly relax into the pose.
If you’re looking for reliable options, the Gaiam Yoga Block, Gaiam Yoga Strap with Adjustable D-Ring, and Gaiam Round Yoga Bolster Pillow (all available on Amazon) are great beginner-friendly props available on Amazon.
They’re simple tools, but they can make a big difference in helping you practice more comfortably and confidently—especially on days when your body feels a little stiff or tired.
The truth is, using props isn’t a shortcut—it’s actually a smart way to practice yoga safely and get more out of each pose.
3. Focus on the Breath
Your breath is your guide. If your breathing feels strained, ease out of the pose and find a more comfortable position.
4. Respect Your Limits
Every body is unique. Avoid comparing yourself to others and honor what your body can do today.
5. End with Rest
Never skip Savasana or a gentle relaxation pose. Taking time to rest helps your body integrate all the benefits of your practice.
Final Thoughts
Learning yoga poses step-by-step is about more than just flexibility or strength—it’s about connecting with your body, calming your mind, and building a practice that feels sustainable and joyful.
Start with the foundation poses, explore strength, balance, and flexibility, and always finish with relaxation. Listen to your body, move with intention, and don’t be afraid to experiment with sequences that suit your needs.
Remember: yoga is a personal journey. Some days you’ll feel strong and energized, other days you might move slowly and mindfully—and that’s perfectly okay. Every session is progress.
All you need to start is a mat, your breath, and the willingness to begin—so roll out your mat and enjoy your practice!
*This article is for informational purposes only and is not intended as medical advice. It should not be used to diagnose, treat, or prevent any health condition. Always consult a qualified healthcare professional before making any changes to your diet, exercise, or health routine.

Linda is the co-founder of Courier Wellness and holds a Diploma in Natural Health Nutrition & Diet. Her passions include photography, food, and travel, where she derives inspiration from diverse cultures and their holistic approaches to well-being. She is committed to helping others make informed, nourishing choices for a healthier life.