Fermented Perfection: How to Make Sauerkraut at Home
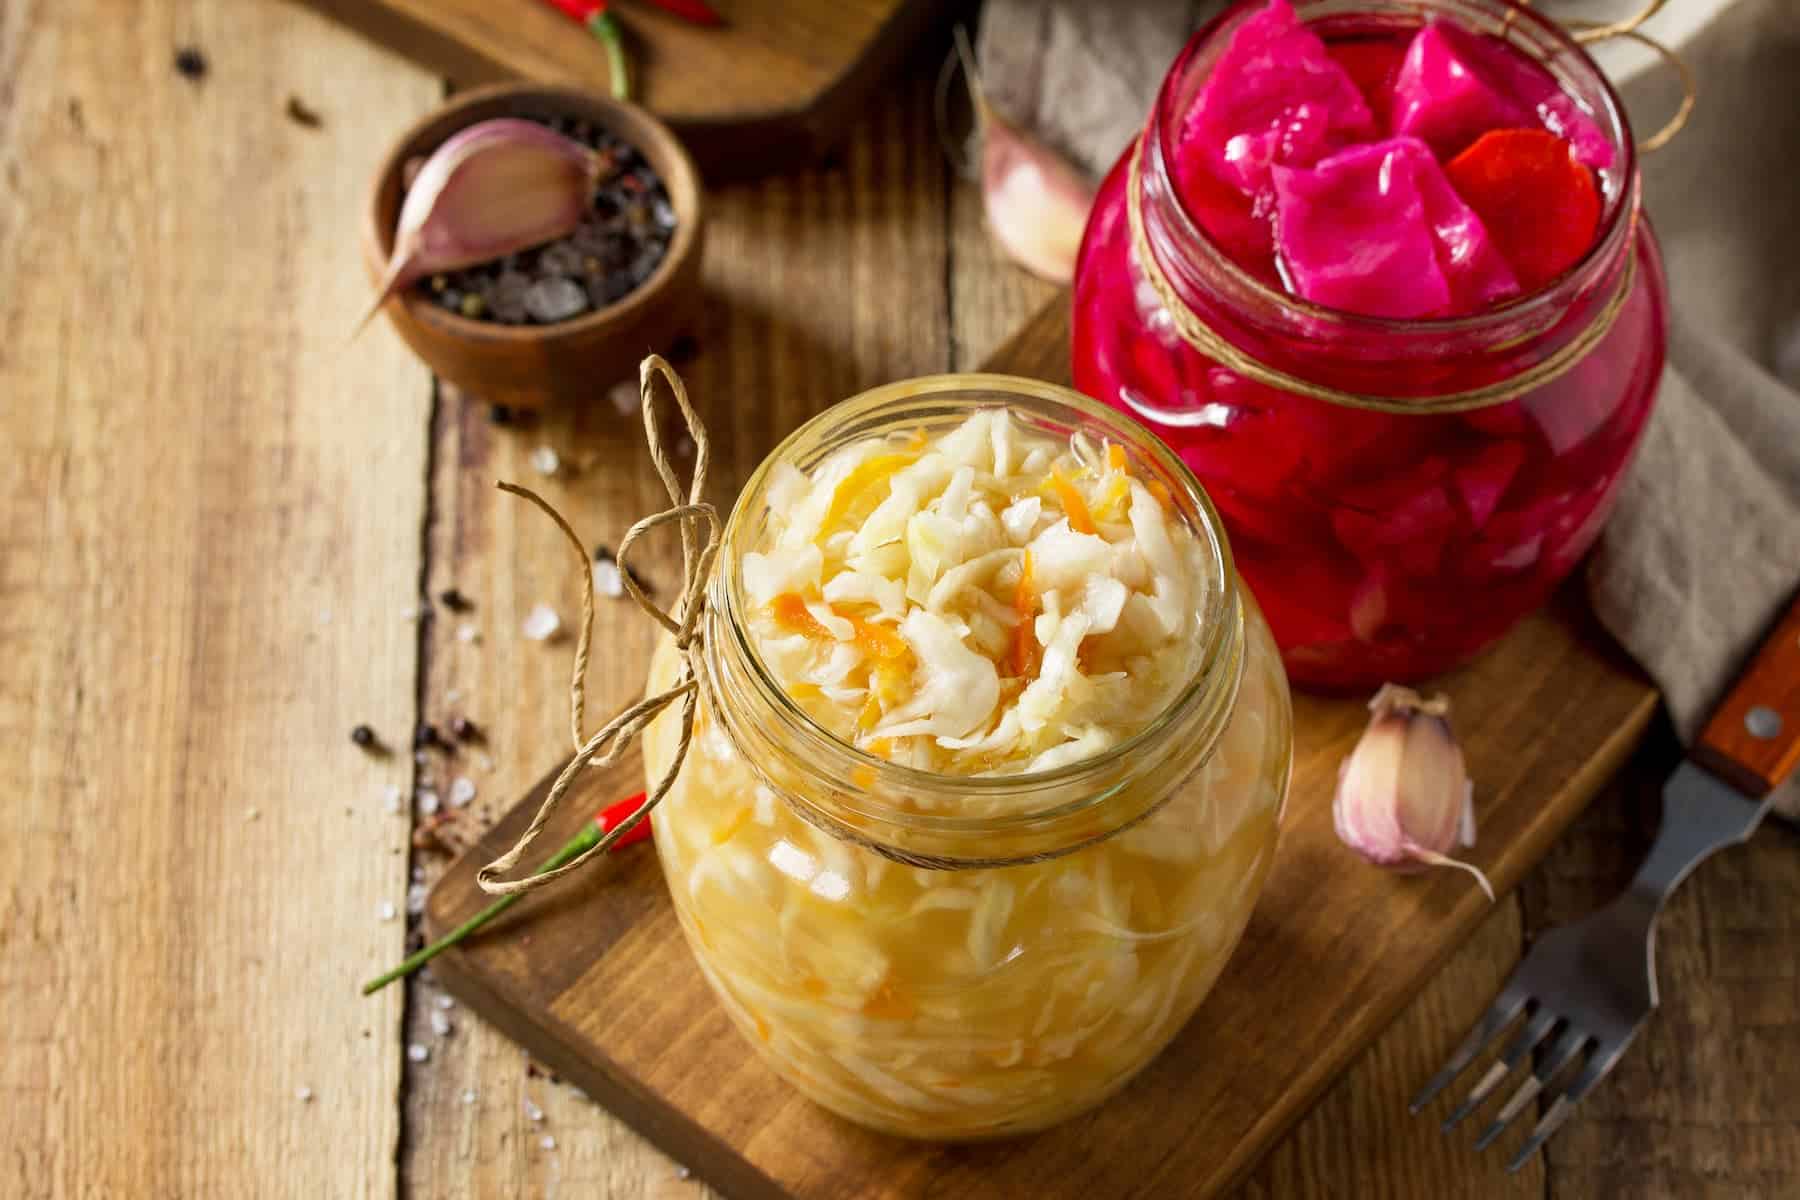
Sauerkraut, a classic fermented cabbage dish, is not only delicious but also packed with probiotics and nutrients that promote gut health. Making sauerkraut at home is a rewarding culinary adventure that allows you to enjoy this tangy condiment just the way you like it.
In this article, we’ll guide you through the steps to create homemade sauerkraut that’s full of flavor and beneficial probiotics.
What is Sauerkraut?
Sauerkraut is a popular fermented cabbage dish that has been enjoyed for centuries. The process of making sauerkraut is relatively simple, involving finely shredded or sliced cabbage that is fermented through lactic acid fermentation.
To create sauerkraut, fresh cabbage is first thinly sliced or shredded, and then non-iodized salt is added. The salt draws moisture out of the cabbage which creates a brine. The brine provides a natural setting where the good lactic acid bacteria from the cabbage begin the fermentation process.
Over time, these bacteria transform the sugars in the cabbage into lactic acid, which not only preserves the cabbage but also gives sauerkraut its characteristic sour taste.
Sauerkraut is renowned for its health benefits. It is an excellent source of probiotics, providing the digestive system with beneficial live bacteria that promote gut health and aid in digestion.
Additionally, sauerkraut is low in calories and a good source of essential nutrients such as vitamin C, vitamin K, and dietary fiber.
This recipe can be enjoyed as a side dish or condiment in various recipes. Sauerkraut pairs very well with sausages, hot dogs, and grilled meats, adding a unique contrast to their flavors.
How to Cut Cabbage
In my experience, I’ve found that the most challenging step in sauerkraut preparation is cutting the cabbage. Achieving the desired consistency and texture during this process can be quite demanding.
So before you start cutting:
- Remove any outer leaves from the cabbage that look wilted or damaged. Set aside a few of these leaves to use later.
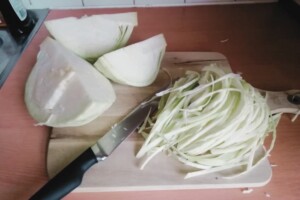
- Cut the cabbage into quarters and remove the core.
- Shred the cabbage finely using a knife, mandoline slicer, or a cabbage slicer. You can make the shreds as thin or thick as you prefer.
What to Do if You Don’t Have Enough Brine
If you find that you don’t have enough brine to completely cover the cabbage in your sauerkraut fermentation jar, you can make additional brine to top it off.
Here’s how to do it:
Ingredients:
- 1 quart (4 cups) of water
- 1.5 to 2 tablespoons of non-iodized salt (such as kosher or sea salt)
Instructions:
- In a clean saucepan, combine 1 quart (4 cups or approx. 1 liter) of water with 1.5 to 2 tablespoons of non-iodized salt. The amount of salt can vary based on your taste preferences, but a good starting point is around 1.5 to 2 tablespoons per quart of water.
- Heat the water and salt mixture over medium heat. Stir it occasionally until the salt is fully dissolved. This will create a brine.
- Allow the brine to cool to room temperature. It’s important not to pour hot brine over the cabbage, as it can affect the fermentation process.
- Once the brine has cooled, pour it over the cabbage in your fermentation jar until the cabbage is completely submerged. Leave some headspace at the top of the jar to allow for expansion during fermentation.
Tips for Success
Here are some tips for success when making homemade sauerkraut:
1. Choose Fresh Cabbage
Start with fresh, crisp cabbage for the best results. The quality of your cabbage greatly impacts the flavor and texture of your sauerkraut.
2. Use Non-iodized Salt
Select non-iodized salt, such as sea salt or kosher salt, for the fermentation process. Iodine can inhibit the growth of beneficial bacteria.
3. Keep Everything Clean
Ensure all equipment, including jars, bowls, and utensils, is thoroughly cleaned and sanitized to prevent unwanted contaminants during fermentation.
4. Massage the Cabbage Well
Take the time to thoroughly massage the cabbage with salt until it releases its natural juices. This step is crucial for creating the brine needed for fermentation.
5. Keep the Cabbage Submerged
It’s essential to keep the cabbage submerged under the brine during fermentation to prevent mold and spoilage. Use a weight to hold it down.
6. Maintain the Right Temperature
Aim for a consistent temperature range of 65-75°F (18-24°C) for fermentation. Avoid extreme temperature fluctuations, as this can impact the quality of the sauerkraut.
7. Taste and Adjust
Taste your sauerkraut periodically during fermentation to gauge its level of tanginess. The longer it ferments, the tangier it becomes. When it reaches your desired flavor, move it to the refrigerator to slow down fermentation.
8. Use a Clean Cabbage Leaf
Placing a clean, intact cabbage leaf on top of the shredded cabbage helps create an effective barrier and keeps the sauerkraut submerged.
9. Be Patient
Fermentation time can vary, so be patient and allow the sauerkraut to develop its flavor at its own pace. It’s worth the wait for the perfect taste.
10. Store Properly
Once fermentation is complete, seal the jar with a lid and store it in the refrigerator. Homemade sauerkraut can last for several months when properly refrigerated.
11. Experiment With Flavors
Don’t hesitate to experiment with flavor additions such as caraway seeds, juniper berries, garlic, or red pepper flakes. These can add unique twists to your sauerkraut.
12. Start Small
If you’re new to sauerkraut making, consider starting with a small batch to get the hang of the process. As you gain confidence, you can scale up.
13. Sweating Time
While it’s not strictly necessary to let the cabbage sweat before massaging and kneading, it is a common and recommended practice in sauerkraut making.
It contributes to a more successful fermentation by ensuring that the cabbage is evenly salted and that it releases enough liquid to create the necessary brine for fermentation.
Allowing the cabbage to sweat with salt for a while before massaging and kneading it will make the process easier.
14. Brine Decrease During the Fermentation Process
If you notice that the brine level has started to decrease during the fermentation process, you need to prepare additional brine. Because the cabbage needs to remain submerged in the brine to prevent spoilage.
In a clean saucepan, create a new batch of brine by combining 1 quart (4 cups or approx. 1 liter) of water with 1.5 to 2 tablespoons of non-iodized salt. Heat the mixture and stir until the salt is fully dissolved. Allow the brine to cool to room temperature.
The disappearance of brine during fermentation is normal, especially in the early stages when the cabbage absorbs liquid. By adding more brine as needed, you maintain the proper environment for fermentation and ensure the safety and quality of your sauerkraut.
15. Discard the Moldy Portion if Necessary
When your sauerkraut comes in contact with air it can mold. If the mold is greenish or grayish color you can remove the moldy portion of the sauerkraut.
Use a clean utensil, such as a spoon or fork, to scoop out the sauerkraut that has mold on it. Make sure you remove a significant margin around the moldy area to ensure you get rid of all potential contamination.
But if the mold is black, orange, or pink then you should toss it out. These colors of mold are often associated with potentially harmful molds, and it’s not safe to consume sauerkraut that shows signs of mold in these colors.
A mold of these colors can produce mycotoxins, which can be harmful if ingested. When dealing with mold on sauerkraut or any food, it’s always best to prioritize safety and dispose of any moldy portions or the entire batch if necessary.

Sauerkraut
Equipment
- A large mixing bowl
- A knife, a mandoline slicer, or a cabbage slicer
- A wooden pounder, a tamper, or potato masher
- A quart-sized, wide-mouth glass jar with a lid
- A weight (small glass or plastic jar filled with water or a purpose-made fermentation weight)
- A clean cloth or paper towel
- A rubber band or string
Ingredients
- 3 pounds cabbage
- 2 tbsp salt (non-iodized, such as sea salt, kosher salt, and Himalayan pink salt)
- 1-2 tbsp caraway seeds (optional)
- 1-2 tsp juniper berries (optional)
- 2-4 cloves garlic (optional)
- 1/2-1 tsp red pepper flakes (optional)
Instructions
- Discard any outer cabbage leaves that appear wilted or damaged. Keep a few of these leaves aside for later use.
- Quarter the cabbage and eliminate the core.

- Using a knife, mandoline slicer, or cabbage slicer, finely shred the cabbage to your desired thickness, whether you prefer thin or thick shreds.
- In a large mixing bowl, place the shredded pre-washed cabbage.
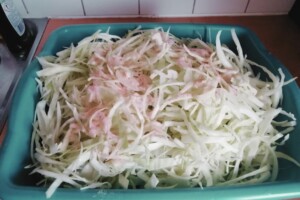
- Sprinkle 2 tablespoons of non-iodized salt over the cabbage.
- Optional: Add flavorings like caraway seeds, juniper berries, garlic, or red pepper flakes to the cabbage for added depth of flavor.
- After you put salt in the cabbage, mix it through with your hands so the whole cabbage has been mixed in with the salt. Then cover it with a lid and let it sit for at least 15 – 20 minutes to allow the salt to draw out some of the cabbage juice naturally. As the cabbage sweats, it becomes softer and more pliable, which makes it easier to massage and knead.
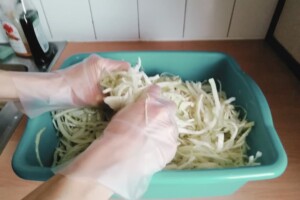
- Using clean hands, massage and knead the cabbage and salt together for about 5-10 minutes. The cabbage will start to release its natural juices and become softer.
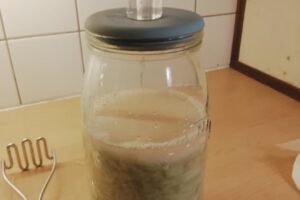
- Transfer the cabbage mixture to a quart-sized, wide-mouth glass jar, a little at a time, pressing it down with a wooden pounder or a tamper after each addition. I like to use a clean potato masher to gently press down on the cabbage as I fill the jar. This helps compact the cabbage and release any remaining air bubbles.
- Fill the jar up to approximately two-thirds of its capacity, as the cabbage may produce bubbles during fermentation, potentially causing overflow if the jar is too full.
- Place a clean, intact cabbage leaf over the cabbage in the jar to help keep it submerged.
- Place a weight (a small glass or plastic jar filled with water or a purpose-made fermentation weight) on top of the cabbage leaf.
- Cover the jar with a clean cloth or paper towel and secure it with a rubber band or string. This allows gas to escape during fermentation while keeping out contaminants.
- Store the jar in a cool, dark place for fermentation. The ideal temperature range is around 65-75°F (18-24°C).
- Allow the sauerkraut to ferment for 1-4 weeks, depending on your taste preference. Taste it periodically until it reaches the desired level of tanginess. The longer it ferments, the tangier it will become.
- Once your sauerkraut has reached your preferred level of fermentation, remove the weight and the cabbage leaf.
- Seal the jar with a lid and transfer it to the refrigerator for long-term storage. The cold temperature will slow down the fermentation process.
- Homemade sauerkraut can last for several months in the refrigerator.
Notes
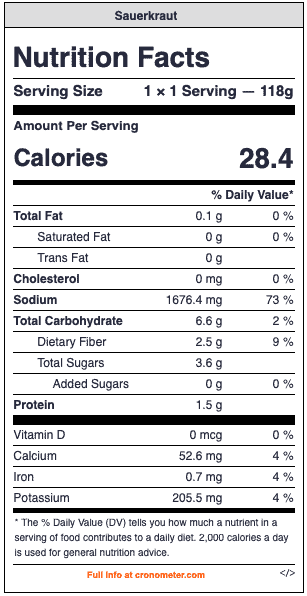
*These nutrition facts were retrieved from Cronometer with permission. Please note that nutritional values are estimated using an ingredient database and should be considered approximate. When multiple ingredient options are provided, the nutritional content is based on the first listed. Garnishes and optional ingredients are not factored into the calculation.
Conclusion
Crafting homemade sauerkraut is a delightful culinary journey that offers a tangy, probiotic-rich condiment bursting with flavor.
With fresh cabbage, non-iodized salt, and a few optional flavorings, you can create a delicious and nutritious accompaniment to your meals. .
By following the steps outlined in this guide and adhering to the tips for success, you’ll ensure that your sauerkraut turns out perfectly fermented and full of that classic tangy goodness.
Whether you pair it with sausages, or sandwiches, or simply savor it as a probiotic-rich side dish, your homemade sauerkraut is sure to be a flavorful addition to your culinary repertoire.
Happy fermenting and bon appétit!

Linda is the co-founder of Courier Wellness and holds a Diploma in Natural Health Nutrition & Diet. Her passions include photography, food, and travel, where she derives inspiration from diverse cultures and their holistic approaches to well-being. She is committed to helping others make informed, nourishing choices for a healthier life.